
3. You’re going to need an electrolyte. Use sodium carbonate at a rate of about a table spoon per gallon of water, maybe less. Note: This is NOT baking soda. Baking soda is sodium bicarbonate.

4. Battery charger. Only a manual battery charger will do. An automatic or trickle charger will not work. I use a 12vdc 15 amp setting but will sometimes set it at 100 amp for a few minutes to get things going. More than 30 or 40 amps is never really needed.

Now that you have your items collected, you’ll need some way to suspend the skillet in the electrolyte solution. NEVER let the cathode and anode metals touch while the battery charger is on or you may be resetting breakers or buying a new battery charger. Below you can see that I use a 1/2″ piece of EMT and a piece of coat hanger to suspend the skillet, and also conduct the circuit. Notice that the negative side of the battery charger is on the skillet, or cathode. Those bubbles you see are hydrogen, use in a well ventilated area! Your water at first will be clear to cloudy white from the washing soda. Mine is orange with rust here because I have already done a few skillets with this water. The solution will last quite a long time and will probably last longer than you can stand to look at it. If you are using a steel drum you will need to line the pipe with rubber hose, or find another way to isolate the circuit. You want the electricity to pass through the electrolyte.


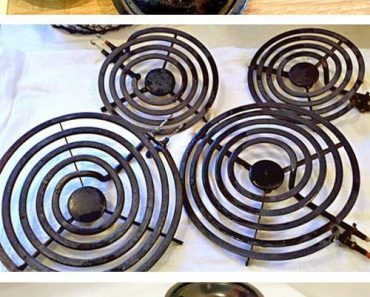
Below are pictures of what the skillet looks like at about 12 hours into the process. Notice the years of gunk and rust falling off of the pan. Use a stainless steel scrubbie to remove as much as possible and put it back in the tank.


…and here is the skillet at about 20 hours in… Take it out and check it once in a while and keep using the stainless steel scrubbie in the sink to remove the gunk and rust until the skillet is free of it. Go to the hardware store and get a little stainless steel or brass brush to get into the handle and/or the branding. I also use a knife or small screw driver to clean out the letters or branding.


Once you think you have the skillet free of gunk and rust, put it back into the tank for a few hours. Once you remove the skillet from the tank, take it to the kitchen and use a product called Bar Keepers Friend and your stainless steel scribbie and brushes to clean it. You will see that the BKF will get gray fast from the carbon in the iron. Rinse. Now, use your dish soap and wash the skillet as you would any other skillet.
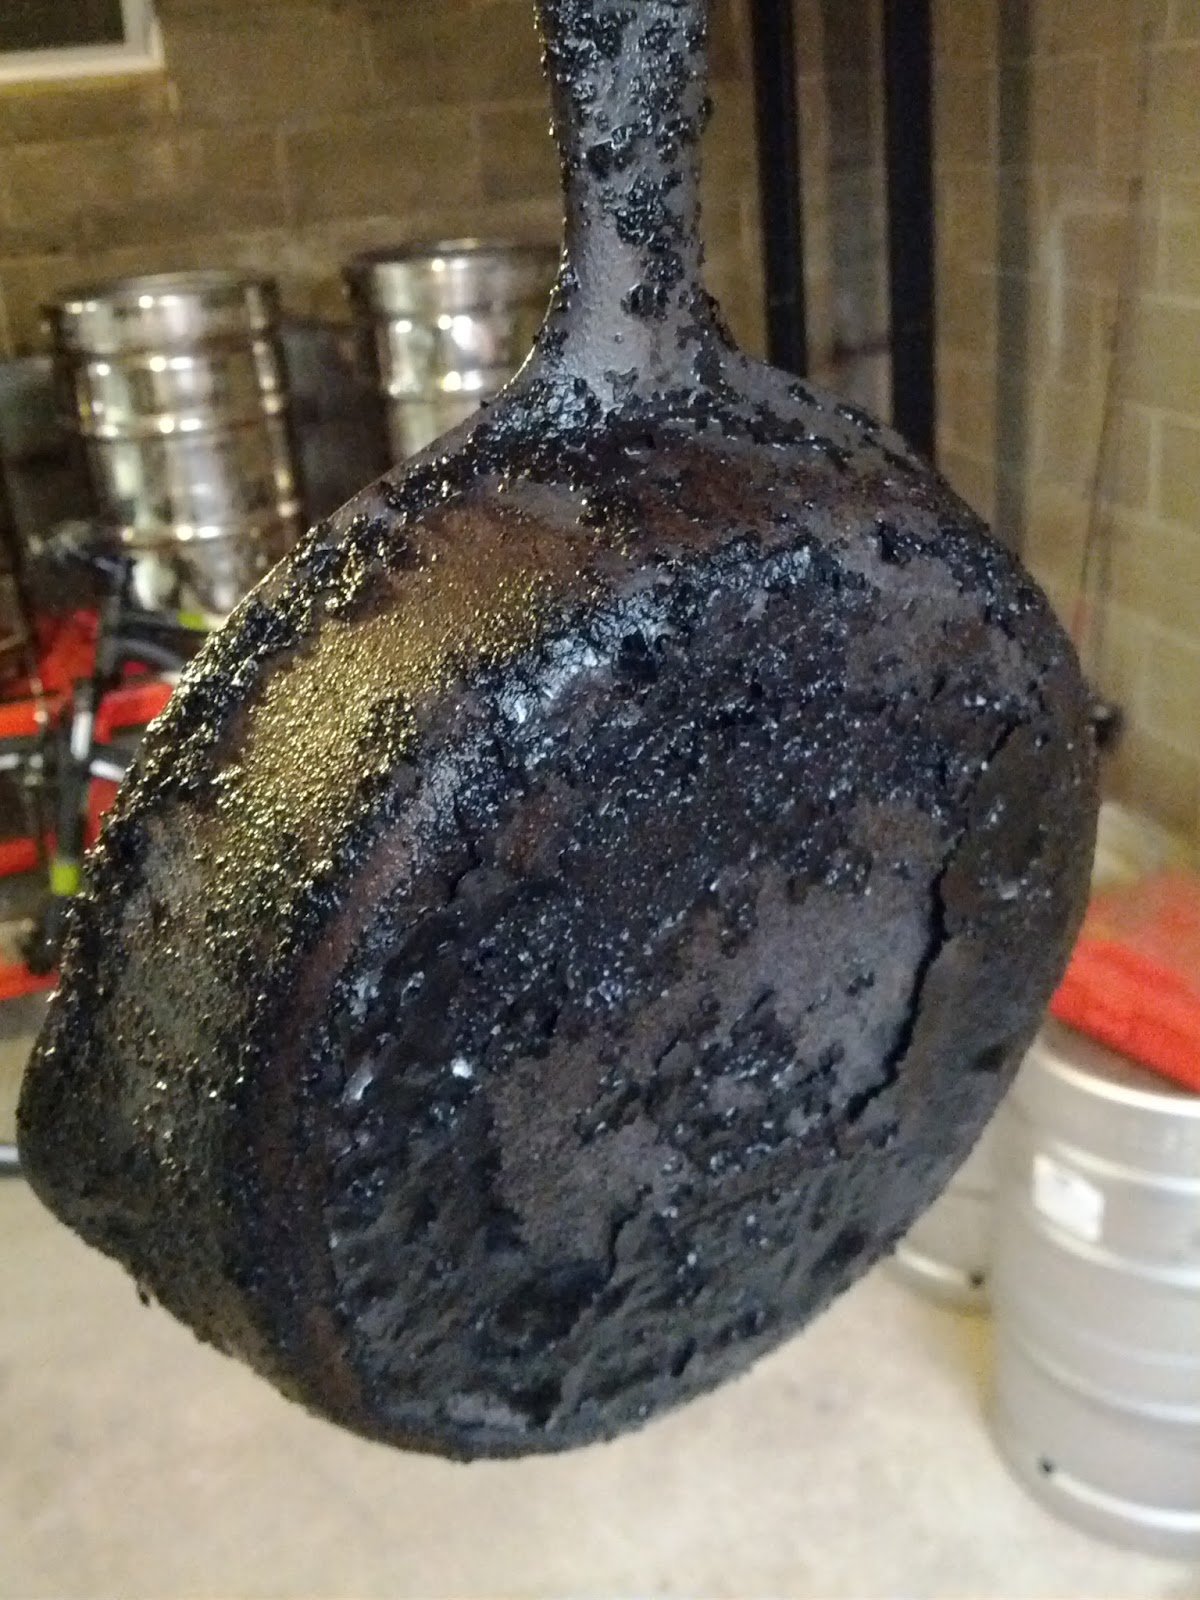
Start your oven on 375. Use paper towels to completely dry the skillet. Your getting ready to bake it for 20 minutes, failing to remove as much water as possible will cause rust spots on the piece in the oven as the water evaporates. Your paper towels will be gray with carbon from the naked metal. This is fine. Bake the naked piece for 15-20 minutes using NO seasoning or oil of any kind. This will completely dry the piece and open the pores of the metal for the seasoning process. Below is what the skillet looks like at this stage.


The above skillet is HOT! It’s just below 375 degrees. Use an oven mitt for this. Let it cool a bit if you’d like but you want it hot enough to melt the Crisco when you apply it.
Seasoning the skillet
Seasoning the skillet is easy. Everyone has their own way of how they think it should be done. I’ll stick to the facts and keep it short. Seasoning has nothing to do with adding spices to the pan. Seasoning is a process where you are heating “oil” past its smoke point so that it chemically hardens and bonds to the metal. Use no oil. Cook with oil all you want but don’t use it for seasoning. You want to use something that is solid at room temperature like Crisco. With the skillet HOT, start applying a thin layer of Crisco to the pan with a folded square of t-shirt or cotton. The entire pan. Top, bottom, handle, everything. The t-shirt will get gray or black from the carbon coming off of the bare metal for the first coat. Apply a very light coat. The hot metal will melt the Crisco and soak up what it wants. Wipe the skillet so it looks wet but don’t apply so much that it leaves streaks or you will have streaks permanently bonded in your cast iron.

Once you have your skillet coated, put it in the oven face down for 45 minutes at 375 degrees. I use the oven mitt the entire time because, well… It’s hot.

There, your 1st coat of seasoning is done. Easy right? When the timer goes off after 45 minutes turn the oven off and get the skillet out with the oven mitt and place back on your work surface. You will notice that the skillet is coated or sealed with a slick, hardened layer of Crisco. It is not greasy or oily at all. While the skillet is still hot, add a 2nd coat of Crisco to the entire thing and put it back in the oven at 375 for 45 minutes. I usually do 3 or 4 coats before the skillet is ready to use. You can pause between coats if you have to leave or something but bring the skillet up to temperature before applying another coat.
Finished skillet ready for use. It has a hard, slick, non-oily seasoning that if treated properly, will become as non-stick as Teflon and last a lifetime.


Cook something greasy the first couple of uses… Burger, or bacon is best. After the skillet is seasoned, never use soap to clean it. Wipe it out with water, dry, apply a light layer of oil or Crisco to the cook surface and bring the oven up to 350. If it is very dirty, use a bit of oil and salt to scrub it. Salt is very abrasive. Or use a green scotch brite pad. Rinse with water and towel dry. Once the oven is up to temperature, pop the skillet in to dry face up, turn the oven off and let it cool as you go about your day.
For Ingredients And Complete Cooking Instructions Please Head On Over To Next Page Or Open button (>) and don’t forget to SHARE with your Facebook friends