For the bottom of the mold, cut a piece of plywood 12×12 that fits tightly inside the mold. This is to prevent the concrete from spilling out the bottom.

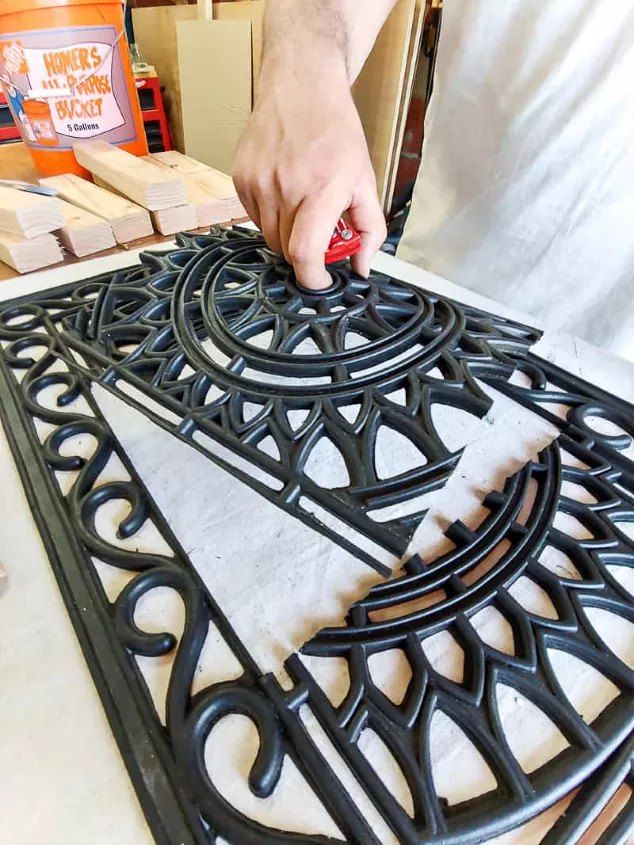
Step 2: Cut rubber mat down to size (12×12 inches)

Step 3: Mix concrete. Grab a bucket, your bag of cement and a trowel for mixing. Add water while stirring until you get the right consistency. Be sure you only mix enough for one stepping stone at a time (which I would estimate is about 1/4 of the bag or so).

Step 4: Pour concrete into garden stepping mold (with the plywood added to the bottom of the mold). Next just simply pour the concrete into your wooden mold.
Be sure to leave about 1/2″ or so at the top to allow room for the rubber door stamp. After you fill the mold, tap the edges of the wooden mold with a rubber mallet several times.
Step 5: Wait until the concrete sets up a little bit and then add the rubber mat as a stamp. Lightly lay the rubber door mat stamp on top and then gently press another 12×12 plywood square on top of the rubber door mat and press down evenly. The extra piece of plywood helps press the mat down evenly and level.
Note: Leave the rubber mat on while drying.
Step 6: Let dry. Drying times will vary based on your weather and humidity levels, but we left it one day.
Step 7: Remove doormat and unscrew mold.
Note: I did not have any troubles with the doormat, plywood or mold sticking to the concrete.

Now you can put your cute garden stepping stone in place and enjoy!
For Ingredients And Complete Cooking Instructions Please Head On Over To Next Page Or Open button (>) and don’t forget to SHARE with your Facebook friends