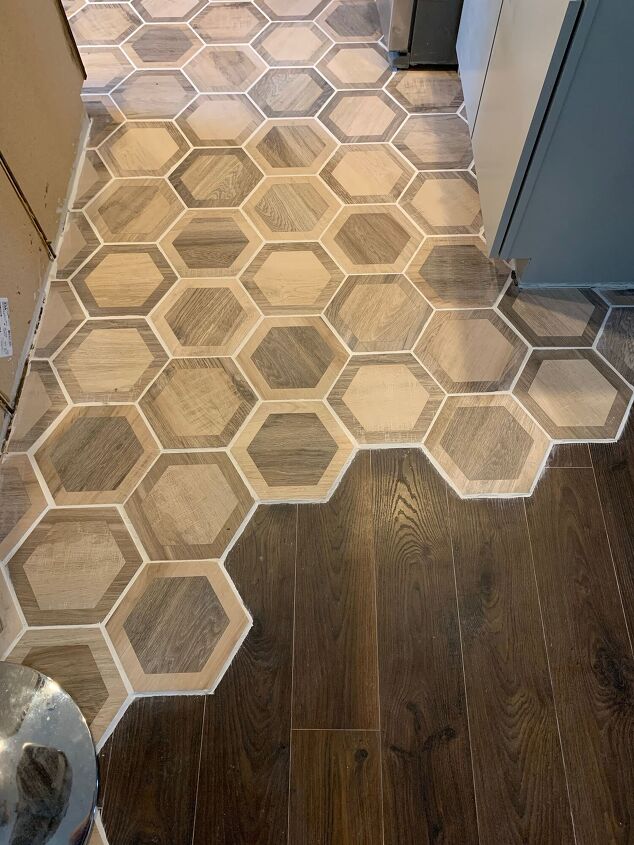
I could use the same tile with the same method here at our entry, and this would also keep us from having too many different kinds of flooring on this main level of our house. This porcelain tile I already know is durable, easy to clean, and textured enough not to be slippery. The tile here at our entry wouldn’t have to be extensive, instead just covering enough of the floor to act like an entry “rug” (and also big enough to get rid of the ruined flooring).
So that was my plan. I needed to get rid of the cat’s mess, plus this sounded like a little, manageable project after my massive bathroom remodel! It was also a plus that I already had all the supplies except the tile, so this was a pretty cheap fix too. (The $250 listed for this project is if you have to buy everything from scratch. The tile was only a little over $100.)
Supplies:
- Hexagon floor tile (mine is from Mission Stone & Tile)
- AquaDefense and/or Schluter membrane
- Rapid-setting thin set mortar
- Grout
- Caulk
Step 1: Plan tile layout and outline. Once my tile arrived, my 4-year-old and I had a grand time planning what shape we’d make the tiled entry. We made some fun shapes, but I ended up laying the tile right over the ruined part of the floor (after I cleaned it as best I could).

I’d guessed correctly (sigh of relief) that we’d only need 1 box. I spaced the tiles exactly how I wanted to grout them, and I made sure to leave out a tile to cut for my filler pieces against our door.
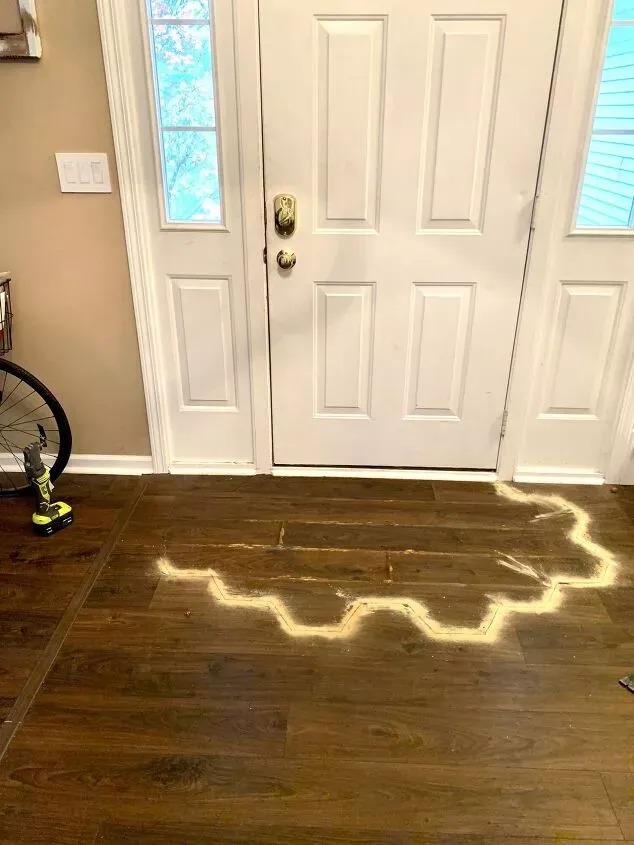
With the tiles down where I wanted them, I took a Sharpie marker and drew right on the floor to make an outline of this plan. I made sure to trace along the tiles’ edge generously, leaving myself some extra space so I could adjust the tiles slightly if I needed. This would also give me room to caulk between the tiles and the existing flooring, just like I would grout the spaces between the tiles themselves.
With this outline done, I carefully moved the tiles back to a pile.
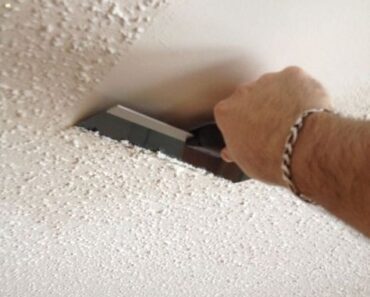
Step 2: Cut out old flooring. This part was messy and gross. But, if your flooring isn’t saturated in cranky old cat spite, you’ll probably be fine. Moving along my traced line, I used my oscillating saw tool to cut the old flooring. This little tool is definitely one of my favorites, and it’s easy to get nice clean cuts in all those hexagon corners.

You can also use a circular saw to cut the long, straight cuts. If you do this, make sure the depth is set to only cut through your flooring and NOT into the subfloor. I used a circular saw thusly when doing our kitchen, and it’s certainly faster! For this project, however, my circular saw was out of commission. 🤦♀️ Oh, well. For all the corners and the places right next to the wall/door, I needed my oscillating tool anyway.
Once my cutting was complete, I used a hammer and pried up one of the boards along my cut line. From there, it was easy to disassemble and remove the flooring – like taking apart a puzzle. I had a garbage bag ready nearby, so I shoved the old flooring into the bag, swept up any debris, and hauled the bag out to the trash. So long, ruined floor!

Step 3: Apply waterproofing. In my kitchen, I’d covered the whole space with Schluter Ditra membrane for total waterproofing. But, that was a bit expensive and seemed overkill for just a little entry space. As an alternative, I had some scrap Schluter Kerdi membrane (much thinner and cheaper) and a lot of AquaDefense liquid membrane left from my bathroom remodel, so I decided to try laying down the Kerdi and then applying a few coats of the liquid membrane on top of that.
For Ingredients And Complete Cooking Instructions Please Head On Over To Next Page Or Open button (>) and don’t forget to SHARE with your Facebook friends